The Ultimate Guide to Making Homemade Vanilla Extract: From Bean to Bottle
- Keto
- |
- Paleo
- |
- Gluten Free
- |
- Vegan
- |
- Whole30
- |
- Low Carb
- |
- Vegetarian
- |
- Dairy Free
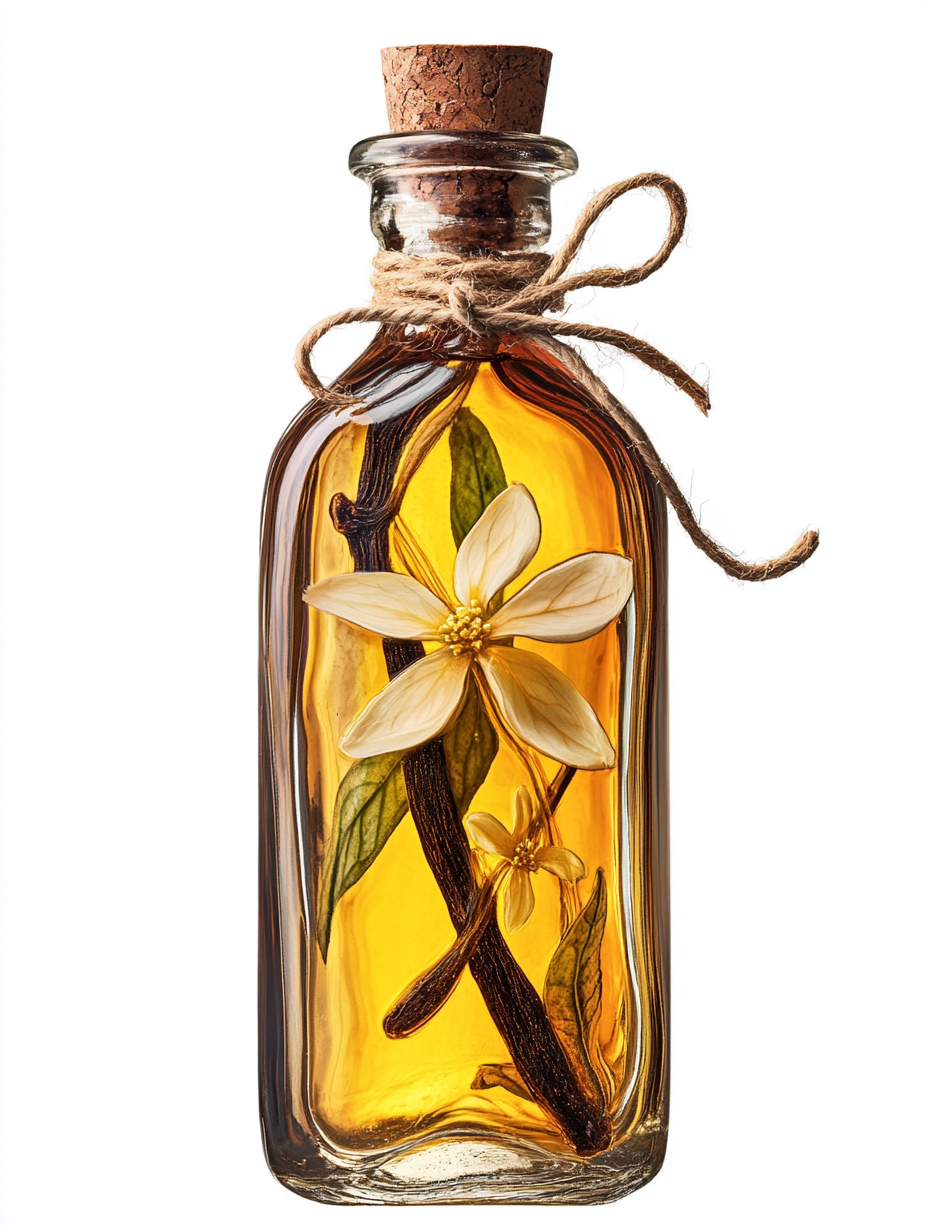
Vanilla extract is a culinary essential, adding depth, warmth, and complexity to a wide array of dishes and baked goods. While it’s easy to pick up a bottle at the store, there’s something special about crafting your own vanilla extract at home. Not only does it allow you to control the quality and intensity of the flavor, but it also makes for a rewarding DIY project and a thoughtful, personalized gift for fellow food enthusiasts.
In this comprehensive guide, we’ll take you through every step of the process, from selecting the best ingredients to bottling and storing your homemade vanilla extract. We’ll also explore the history of vanilla, dive into the different varieties available, and share some creative ways to use your artisanal extract. Whether you’re a seasoned baker or a curious home cook, this guide will equip you with everything you need to know to create your own delicious vanilla extract.
The History and Science of Vanilla
Before we dive into the process of making vanilla extract, let’s take a moment to appreciate the rich history and fascinating science behind this beloved flavoring.
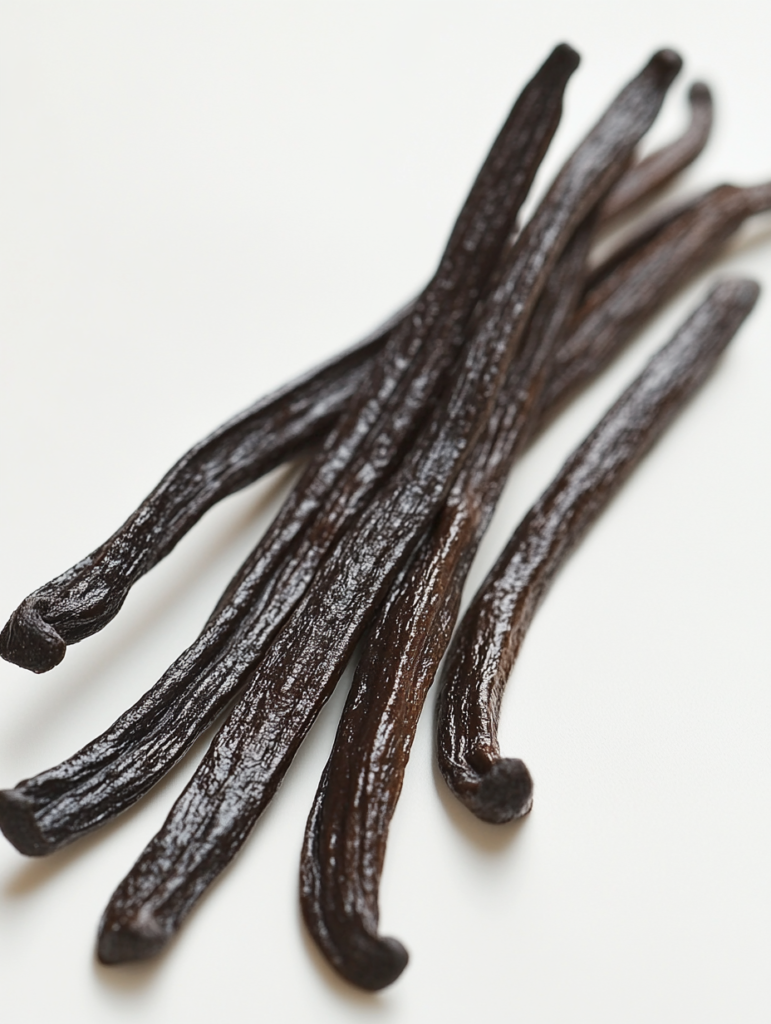
Vanilla is derived from orchids of the genus Vanilla, primarily from the species Vanilla planifolia. Native to Mexico and Central America, vanilla has been used for centuries, with its earliest documented use dating back to the Totonac people of eastern Mexico in the 15th century. The Aztecs later adopted vanilla and used it to flavor their chocolate drinks.
It wasn’t until the 19th century that vanilla became widely available outside of its native region, thanks to the discovery of hand pollination techniques. Today, vanilla is grown in tropical regions around the world, with Madagascar being the largest producer.
The science behind vanilla’s iconic flavor is equally fascinating. The primary compound responsible for vanilla’s aroma is vanillin, but vanilla beans contain hundreds of other compounds that contribute to their complex flavor profile. When we make vanilla extract, we’re essentially using alcohol to draw out these flavor compounds from the beans, creating a concentrated essence of vanilla.
Ingredients
- Vanilla Beans:
- 4-5 beans per 8 ounces (240 ml) of alcohol
- Choose from varieties such as Madagascar Bourbon, Tahitian, Mexican, or Indonesian
- Alcohol:
- Vodka (recommended for a neutral base)
- Other options: Rum, bourbon, or brandy (for unique flavor profiles)
- Must be at least 35% alcohol (70 proof), preferably 40% (80 proof) or higher
Tools
- Clean glass bottles with tight-fitting lids
- Sharp knife
- Cutting board
- Funnel
- Labels and marker (optional)
- Cheesecloth or fine-mesh strainer (for filtering, if desired)
Selecting Your Vanilla Beans
The quality of your vanilla extract depends largely on the beans you use. Here’s a more detailed look at the most common varieties:
Madagascar Bourbon Vanilla
- Origin: Madagascar, Comoros, and Réunion
- Flavor profile: Rich, creamy, and full-bodied with a hint of tobacco
- Best for: All-purpose use, especially in baked goods and desserts
Tahitian Vanilla
- Origin: Tahiti and other Pacific islands
- Flavor profile: Floral, fruity, and cherry-like with a hint of anise
- Best for: Delicate desserts, fruit-based dishes, and cold applications
Mexican Vanilla
- Origin: Mexico
- Flavor profile: Bold, smoky, and spicy with woody undertones
- Best for: Chocolate dishes, spicy foods, and savory applications
Indonesian Vanilla
- Origin: Indonesia, primarily Bali and Java
- Flavor profile: Woody, earthy, and smoky with a hint of leather
- Best for: Chocolate dishes, savory foods, and bold desserts
When purchasing vanilla beans, look for those that are plump, oily, and pliable. They should have a strong, pleasant aroma. Avoid beans that are dry, brittle, or have a musty smell.
Choosing Your Alcohol
The type of alcohol you use will affect the final flavor of your extract. Here are some options to consider:
Vodka
- Neutral flavor allows the vanilla to shine
- Recommended for first-time extract makers
- Best for all-purpose use
Rum
- Adds a slight sweetness and complexity
- Light rum for a subtle flavor, dark rum for a bolder profile
- Pairs well with Madagascar Bourbon and Tahitian vanilla
Bourbon
- Contributes caramel and oak notes
- Complements the natural vanillin flavors
- Excellent with Mexican and Indonesian vanilla
Brandy
- Adds fruity and floral notes
- Creates a rich, complex extract
- Pairs well with Tahitian vanilla
Regardless of the type you choose, ensure the alcohol content is at least 35% (70 proof), with 40% (80 proof) or higher being ideal. This high alcohol content is necessary for proper extraction and preservation of the vanilla flavors.
Step-by-Step Instructions
Now that we’ve covered the ingredients and tools, let’s walk through the process of making your homemade vanilla extract.
Step 1: Prepare Your Workspace
Start with a clean, uncluttered workspace. Sanitize your bottles, knife, and cutting board to ensure your extract stays free from contaminants.
Step 2: Prepare the Vanilla Beans
- Rinse the vanilla beans under cool water and pat them dry with a clean towel.
- Using a sharp knife, split each vanilla bean lengthwise, leaving about an inch connected at one end. This exposes the tiny seeds inside, allowing for better flavor extraction.
- If desired, scrape out some of the seeds and add them directly to your bottle for a more intense flavor and visual appeal.
Step 3: Add Beans to Bottles
Place the split vanilla beans into your clean glass bottles. You can cut them to fit if necessary, but try to keep them as whole as possible.
Step 4: Add Alcohol
Using a funnel, carefully pour your chosen alcohol over the vanilla beans. Make sure the beans are completely submerged. A good ratio is 4-5 vanilla beans per 8 ounces (240 ml) of alcohol, but you can adjust this based on your preference for strength.
Step 5: Seal and Label
Tightly seal the bottles and label them with the date and type of vanilla and alcohol used. This will help you keep track of different batches if you’re experimenting with various combinations.
Step 6: Store and Wait
Place your bottles in a cool, dark place like a pantry or cupboard. Avoid direct sunlight, which can degrade the flavor and color of your extract.
Step 7: Shake Regularly
Once a week, gently shake your bottles to help distribute the vanilla flavor throughout the alcohol.
Step 8: Be Patient
The hardest part of making vanilla extract is waiting! While you can start using your extract after about 8 weeks, for the best flavor, allow it to steep for at least 3-6 months. Some extract makers even wait up to a year for an incredibly rich and complex flavor.
Step 9: Taste and Adjust
After the initial steeping period, you can start tasting your extract. If you want a stronger flavor, simply let it continue to steep. You can also add more vanilla beans if desired.
Step 10: Strain (Optional)
If you prefer a clear extract without vanilla bean particles, you can strain it through a cheesecloth or fine-mesh strainer before using or gifting.

Tips & Tricks
- Use grade A vanilla beans for the best flavor. While they may be more expensive, the quality difference is noticeable in the final product.
- Don’t be tempted to use a lower alcohol content – it won’t extract the flavor as effectively and may not preserve the extract properly.
- Make larger batches to save time and have plenty on hand for gifting. Vanilla extract only gets better with age, so there’s no harm in making extra.
- Experiment with different vanilla bean varieties and alcohol types to create unique flavor profiles. You might discover a combination that becomes your signature extract.
- Keep the beans in the bottle even after you start using the extract. As you use the extract, you can top it off with more alcohol to create a perpetual batch.
- If you notice any signs of mold or off-odors, discard the extract immediately. However, this is rare if you’ve used the correct alcohol content and kept your equipment clean.
Storing Your Homemade Vanilla Extract
When stored properly in a cool, dark place, homemade vanilla extract can last indefinitely. The high alcohol content acts as a natural preservative. Keep your extract away from heat sources and direct sunlight to maintain its quality.
Using Your Homemade Vanilla Extract
Your homemade vanilla extract can be used just like store-bought versions in any recipe calling for vanilla. Here are some ideas to get you started:
- Baking: Use in cakes, cookies, muffins, and other baked goods for a rich vanilla flavor.
- Beverages: Add a splash to coffee, hot chocolate, or homemade cocktails.
- Breakfast: Enhance pancakes, waffles, or French toast batter with a teaspoon of your extract.
- Savory dishes: A small amount can add depth to sauces, marinades, and even some meat dishes.
- Homemade ice cream: Create your own vanilla ice cream base with your artisanal extract.
- Fruit salads: A few drops can enhance the natural sweetness of fruit.
- Homemade beauty products: Add to homemade lotions or scrubs for a natural fragrance.
Beyond Vanilla Extract: Other Vanilla Products You Can Make at Home
Once you’ve mastered vanilla extract, you might want to try your hand at other vanilla-based products:
- Vanilla sugar: Split a vanilla bean and bury it in a jar of sugar. Let it infuse for several weeks, shaking occasionally.
- Vanilla salt: Similar to vanilla sugar, but using sea salt instead. Great for both sweet and savory applications.
- Vanilla powder: Dry vanilla beans completely and grind them into a fine powder. Use in recipes where you don’t want to add liquid.
- Vanilla paste: Combine scraped vanilla seeds with a small amount of extract to create a thick paste.
The Environmental and Ethical Considerations of Vanilla Production
As you embark on your vanilla extract-making journey, it’s worth considering the broader impact of vanilla production. Vanilla is the second most expensive spice in the world (after saffron) due to its labor-intensive cultivation process. Each vanilla orchid flower must be hand-pollinated within 12 hours of opening, and the beans require months of careful curing after harvest.
This process, combined with increasing global demand, has led to some ethical and environmental concerns in vanilla-producing regions. Issues include deforestation, exploitation of workers, and price volatility that can devastate small farmers.
As a conscientious consumer, you can make a positive impact by:
- Sourcing fair trade or direct trade vanilla beans when possible.
- Supporting companies that have transparent and ethical sourcing practices.
- Using your homemade extract wisely and avoiding waste.
- Educating others about the value and labor behind real vanilla products.
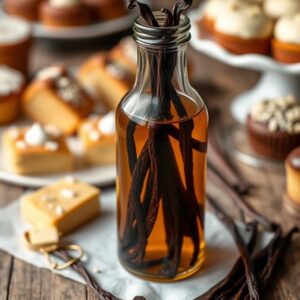
Homemade Vanilla Extract
Ingredients
- 6 vanilla beans
- 8 ounces 240 ml vodka or other neutral spirit (40% alcohol content or higher)
Instructions
- Split each vanilla bean lengthwise, leaving about an inch connected at one end.
- Place the split vanilla beans in a clean glass bottle.
- Pour the alcohol over the beans, ensuring they are completely submerged.
- Seal the bottle tightly and label it with the date.
- Store the bottle in a cool, dark place.
- Shake the bottle gently once a week.
- Allow the extract to steep for at least 8 weeks, preferably 3-6 months, before using.
Notes
– You can experiment with different types of alcohol like rum or bourbon for unique flavor profiles.
– The extract can be used after 8 weeks, but the flavor improves with longer steeping times.
– Store in a cool, dark place. When properly stored, homemade vanilla extract can last indefinitely.
Frequently Asked Questions
Can I Use Imitation Vanilla Flavoring Instead of Vanilla Beans?
Envision this: you’re about to make vanilla extract, but you’ve only got imitation vanilla flavoring. Unfortunately, you can’t use it as a substitute for vanilla beans in homemade extract. Imitation vanilla is already a processed product, lacking the complex flavors and compounds found in real vanilla beans. To create authentic vanilla extract, you’ll need genuine vanilla beans steeped in alcohol. This process extracts the beans’ natural flavors, resulting in a richer, more nuanced product than what you’d get from imitation flavoring.
Is Homemade Vanilla Extract Safe for People With Alcohol Sensitivities?
If you have alcohol sensitivities, homemade vanilla extract might not be safe for you. It’s typically made by steeping vanilla beans in alcohol, usually vodka or bourbon. The final product contains a significant amount of alcohol, which can trigger reactions in sensitive individuals. You’d need to use it sparingly or consider alcohol-free alternatives. If you’re concerned, consult your doctor before consuming homemade vanilla extract. Remember, even store-bought extracts contain alcohol, so always check labels carefully.
How Long Does Homemade Vanilla Extract Last Before It Goes Bad?
Your homemade vanilla extract will last longer than the pyramids! Typically, it’ll stay good for years if stored properly. You’ll want to keep it in a cool, dark place in an airtight container. The high alcohol content acts as a preservative, preventing spoilage. However, you should periodically check for any off-odors or visible mold. If stored correctly, your homemade vanilla extract can maintain its quality for 5-10 years, though it’s best used within the first 2-3 years for peak flavor.
Can I Sell My Homemade Vanilla Extract Commercially?
If you’re considering selling your homemade vanilla extract commercially, you’ll need to comply with local, state, and federal regulations. You’ll have to obtain proper licensing, follow food safety guidelines, and guarantee your product meets labeling requirements. It’s essential to research the legal aspects, including business registration and health department certifications. You might also need to secure a commercial kitchen space. Remember, selling food products comes with significant responsibilities, so it’s wise to consult with a lawyer or business advisor before launching your venture.
Is It Cheaper to Make Vanilla Extract at Home Than Buying It?
You might find that crafting your own vanilla extract is a bit kinder to your wallet than purchasing it. The initial investment in vanilla beans and vodka can seem steep, but it pays off over time. You’ll get more extract for your money, and it often has a richer flavor. Plus, you can control the quality and strength. However, consider factors like time investment and storage space when deciding if it’s worth it for you.
Conclusion
Creating your own vanilla extract at home is a rewarding process that allows you to customize your flavoring and appreciate the complexity of this beloved ingredient. With just two main ingredients and a good dose of patience, you can produce a vanilla extract that rivals or surpasses many commercial versions.
Remember, the key to great homemade vanilla extract lies in quality ingredients and time. Don’t rush the process – the longer your extract steeps, the richer and more complex its flavor will become.
We hope this guide has inspired you to try making your own vanilla extract. Whether you’re using it in your baking, gifting it to friends, or simply enjoying the satisfaction of a homemade ingredient, your efforts are sure to result in a flavorful, aromatic extract that will enhance your culinary creations for months or even years to come. Happy extracting!
